Tables should be designed so that a screen reader can easily navigate and interpret them. In Adobe Acrobat, column and row headers can be added to tables to make them more accessible.
Tables should never be used for organizational purposes in documents. Only use tables to display data or show relationships, and keep them as simple as possible. If you have a complex table, consider breaking it into multiple smaller tables, each with its own title. If this is not possible, be sure to add alternative text to the table for additional explanation for someone using a screen reader.
Adding Column and Row Headers to Tables in Adobe Acrobat
1. Open Adobe Acrobat and select the
Accessibility tool in the tools menu on the right. If you do not see it, select the
More Tools option to add it to your tools menu.

2. Select the
Fix Reading Order option from the tools menu.

3. Ensure the table has been tagged as a "Table" from the Reading Order window (
more information on how to tag PDF documents is linked here ). Once tagged, open the Reading Order window and click on any part of the table. Once a part of the table has been selected, select "Table Editor" from the Reading Order window.

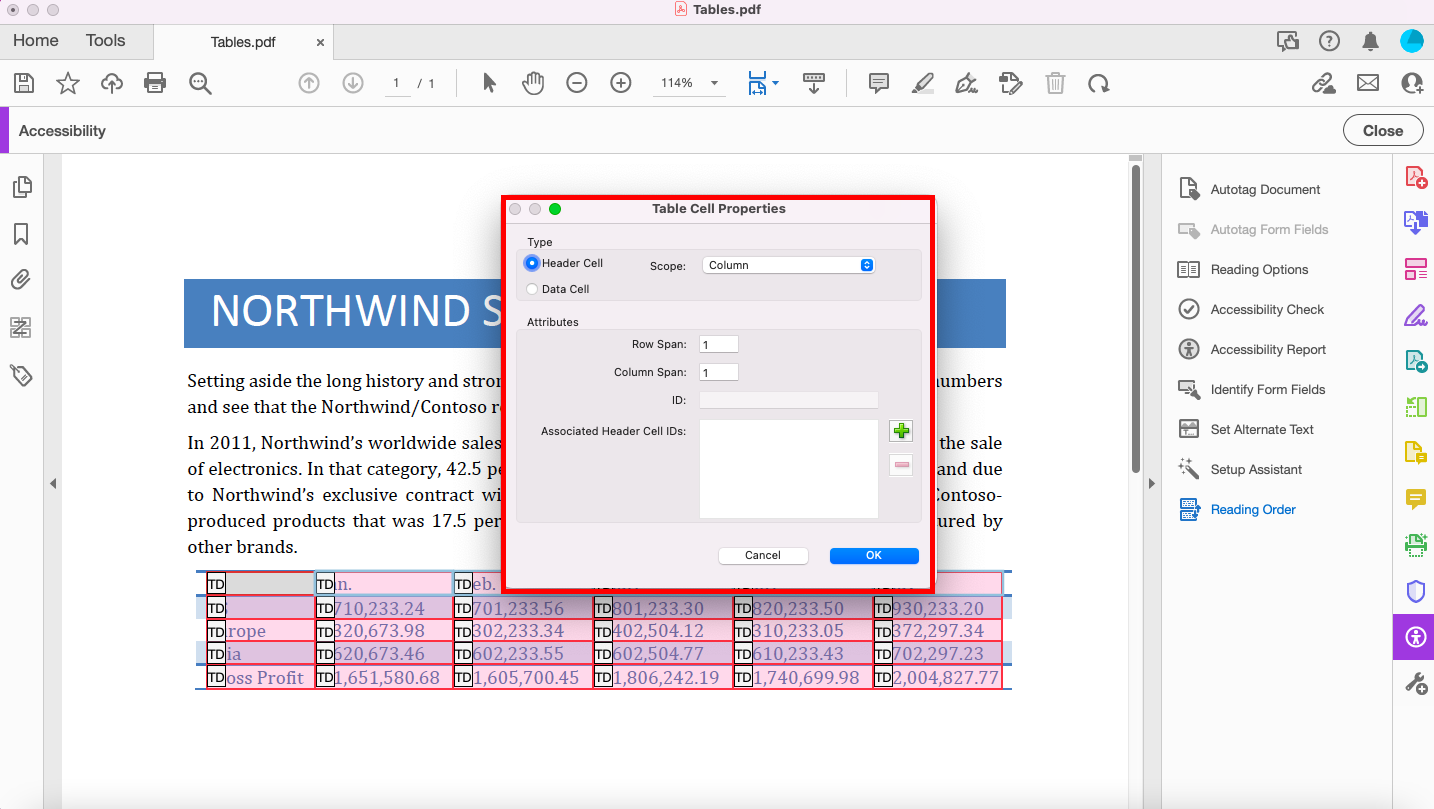
4. Each cell of the table will be labeled "TD", which stands for "table data". The problem is that some of these cells are actually header cells and need to be labeled as such. To label the header cells as header cells, right click in one of the cells and select "Table Cell Properties". You can also click and drag your cursor across multiple cells to edit them in bulk. The cells that are selected are highlighted in blue.

5. In the window that pops up, select the
Header Cell bubble and change the Scope dropdown to
Column.
There is also an option for
Row headers. Once the type of header cell is selected, select
OK.
6. The cells will now be labeled as "TH", which stands for "Table Header". Repeat this process for any other column and row headers you have in your table.